Tuesday, November 1, 2011

Halloween 2011, photos of the result!

So, after a good night of rest, I'm uploading what you've all been asking for: pictures of the finished dress!

Here's the corset and bustle. When I took the picture, I'd been wearing it (and sitting on it) all day and it had collapsed quite a bit. It was much poofier in the back when I left in the morning! I know you're going to ask the question: how to you sit in a regular chair with this thing? Well,  you just sit and it kind of collapses behind you, you don't even feel it! I'm sure not all Victorian bustles were this way, but the one made with Truly Victorian pattern is and it's such a blessing to be able to sit in a regular chair - after all I wore it to work...


Here's the inside of the bustle. The bones are held by ropes inside so you can adjust the poofiness of the skirt at will, and store it flat, two big advantages in the modern world. I also suspect that the fact I can sit in this thing so comfortably is also due to the inside strings allowing the bones to move independently.


Next layer is the skirt. It's heavily pleated (and longer) in the back, which allowed me to hide my small mistakes (I placed the pattern the wrong way on the fabric and had to make a center seam in the back to fix it). My bustle collapsed slightly during the day so the skirt dragged on the ground in the back.


Next the overskirt goes on. There's not much to say about this layer. It looks much more complex than it actually is and it's easy enough to build.


And finally, the bodice. I think I actually made it a little too big, especially at the top, when I enlarged it (it was originally a little to small), so there wasn't enough tension on the hooks and they tended to pop off. But, as I said before, too big is infinitely better than too small. I put 25 pairs of hooks and eyes on the front of the bodice. This the only part I hated doing. I brought them to work so I could do 3 or 4 every lunch hour, because it's so long and boring to sew.


I styled my hair using tips from Rapunzel's Resource. This girl is amazing. I've had long hair my whole life and doing anything more than a ponytail seemed impossible, but she makes everything look so very simple! I still went for a simple bun instead of something more elaborate because I was really short on time in the morning.


I've had the necklace for a very long time. It's not the right style for the period, but I thought it looked really good with the dress. The bracelet, gloves and earrings I bought at Ardène, as I did the black flower in my hair. I had to fix the earrings to convert them to clips because my ears aren't pierced. The mask is a cheap cardboard mask I bought at Value Village (but they had almost the same ones at the dollar store this year).


I think it worked well. It's the first time total strangers (women, all of them) talk to me in the metro and near the office to tell me now nice they think my costume is. This one was particularly liked by little girls when I was opening the door to give candy (by then I'd removed my mask though, I was afraid it would get deformed by body heat - I'll need to line it with something better than cardboard if I want to wear it for a longer time).

And, finally, here's the decorations we managed to get together after I ran out of time for the giant tree. Sometimes it pays to have a lighting technician as a boyfriend :-)

So, we cut out a small tree out of cardboard (actually, Richard did). And he wants me to insist: doing it this way WAS HIS IDEA! :-)


I like taking pictures of him working :-)


Here's the setup (with an old, real, theater spotlight, and a small Ikea one; the big one being 10 times stronger than the other one, that's the one we put the pale purple colour on).


And here's what it looked like from outside. Not exactly what I was going for, but pretty nonetheless, I think :-)


Sunday, October 30, 2011

Halloween 2011

Here's the first part of the promised update about Halloween this year.

I cut the pannier skirt from an old sheet I bought at Village des Valeurs. I figured I'm probably going to wear it only a few times anyway so it doesn't need to be super tough.

Bonus: This part I was able to cut on the table instead of the floor.


Below you can see the boning channel guides for the pannier skirt. I used transfer paper and a tracing wheel. For those kinds of marks, there are not that many ways to get a great transfer.


And here it is with the channels sewn. I'll have pictures of it being worn when I put it on next Monday!


Next I made the bodice. Sorry I don't have any pictures of the construction. I used a very stiff and heavy fabric for the interlining, so I decided not to bone it. Maybe I should have, but I didn't want to add too much thickness to the seams. And it turned out that it was a good thing too, because I made the bodice slightly too small, so I had to ease out the side and center back seams. Now, I think it's a tiny bit too big, but that's much, much better than too small!


And then I made the overskirt. You can see the pleats on the side here. Towards the left there's supposed to be one last pleat, but I couldn't figure out how to gather it without the wrong side of the fabric showing. I ended up folding everything together, including the bottom of the previous folds, into the seam. That seems to work alright.


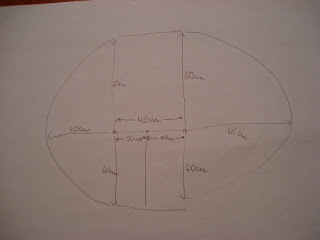
Next is the double box pleats at the back of the overskirt. Those were, surprisingly, super easy to make and turned out great. They'll be draped over the pannier right on my oversized behind. You'll see, this is going to be super elegant.


Here's the new corset! I had to rip out and recycle boning from the previous, much too small one, because there wouldn't have been enough time to order some new. This time I didn't shorten it at the waist or at the top, but I removed one full inch from the bottom. I think it could still have been shortened a little bit at the waist, but it still fits fine anyway. Much better than the previous one.

Turns out I actually made it slightly too big, so I had to take an extra seam at the center back to make it slightly smaller.


I don't have pictures of the skirt in progress, but it's the same fabric as the corset. I made it just before and it went so incredibly fast! Well, except that there wasn't supposed to be a seam at the center back... I just placed the piece the wrong way on my fabric. It'll be hidden in the pleating anyway so it doesn't matter, it was just a funny stupid mistake to make!

I even had time to make a cape! Below are pictures of the cape all marked and ready to be cut, and the pattern right below it. The trick when making a circle cape is to draw two half circles, taking your shoulder points as a reference. This way the length is just about even all around, instead of it being shorter at the sides and longer at the back and front.


Everything went so incredibly fast. I think I was expecting a lot of snags along the way so I planned for about twice the expected time to start with. When almost no snags happened, I was left with all this extra time! Which is good, because, by then, I had a cold, and I used the time to rest.

But I think the fact that it went so quickly is due to two main reasons: 1- I'm using Truly Victorian patterns, which are well made and true to advertised size. And 2- Since it's not the first time I use them, I know exactly where to fuse the sizes and shorten them so they fit right. I'm a small in the shoulders, and a medium for waist and hips, which means that I need to redraw the pattern pieces before I start. And I'm also short-bodied, which means I remove half an inch at the waist line and half an inch at the midpoint between bust and shoulders, which is a little trickier because it also involves lowering the armscye. But it works, every single time. That's only for the bodice though; for the skirts, I just do the medium size (and yes, they run extremely small, I wear sizes 0-2 in modern sizes in most stores - that is, those that make sizes small enough for me - so if the size medium fits me, imagine how small those patterns really are!).

So, things went well and fast. I bought some accessories, converted earrings to clips, dug out my old makeup and spent a lot of time on Rapunzel's Resource learning how to style long hair. I think it's all going to  go together great and look fantastic :-)

And last but not least... I wanted to make a special giant tree for my big front window. I would have painted it with black paint on white fabric and lighted it from behind, but I ran out of time. It will be magnificent... next year :-)


Saturday, October 15, 2011

New projects

Remember last year? I had all those projects...
http://audreybmorin.blogspot.com/2010/09/new-projects-halloween-soon.html

This year I'm using the beautiful fabric I bought last year. I'm taking pictures, I swear!

The bustle is done. The bodice is done (needs hooks and eyes). The skirt will go pretty fast.

Then I'll need to deal with my corset. Remember last year, it was rather small for me already? http://audreybmorin.blogspot.com/2010/10/corset-done-whats-next.html Well, I put on some weight; so now it's even smaller. I'm debating making a new one (reusing the boning would be a good investment) or making this one bigger by inserting panels in the center front, sides and back. Two weekends left before Halloween, will there be time to make a new one? I mean, it's not that long after all... but I don't want to come up short...

Sunday, July 10, 2011

Taiko drumming

My newest invention: a taiko drum made from a garbage can and some packing tape. It actually has a rather decent sound, considering the price and the "quality" of materials!

Well, this was just an excuse to give you the link to our student group drumming in the park this afternoon ;-)

https://picasaweb.google.com/audreybmorin/20110710MontRoyal?authuser=0&authkey=Gv1sRgCMC56urCur25nwE&feat=directlink

Wednesday, May 25, 2011

Been quiet...

... but not quite!

Actually, I have several projects to show you, but the computer went kaput several times since January, so I haven't gotten around to uploading everything.

Soon, I promise :-)

Monday, March 7, 2011

Words of a taiko sensei

See what sensei Walter Tsushima has to say about taiko... it sounds a lot like what I was saying in my last post, doesn't it?


He's going to teach us a class at the end of the month; I can't wait!
As you train in the taiko arts, you will see improvements in your speed, flexibility, coordination, discipline, confidence and ability to focus your mind.  You will find that the skills that it takes to succeed in taiko are the same skills that it takes to succeed in life.  The lessons that you learn in taiko can be applied to every area of your life including your education, career, relationships, and overall philosophy of life. 
If you can master taiko, you can master anything.


Read the full thing here (at the bottom of the page).

Wednesday, February 16, 2011

Learning taiko

I have been taking taiko lessons with Arashi Daiko since September.

True, taiko is, before anything else, drum playing. But it is so much more than that. It is profoundly intertwined with Japanese cultural under- and overtones; while at the same time being far less rigid than you would expect from an art emanating from Japan.

There is no right way of playing taiko (there might be wrong ways, though!). This might be unsettling for a beginner; having a different teacher every few weeks sometimes teaching contradicting techniques. But it is also a  very efficient way of growing, very fast.

What is taiko? Think of it like a martial art. A way of concentrating all the energy of the universe in your center, then channeling it through your arm, into the tip of the bachi, into a drum. And the drum answers you.

This feeling is not quite attainable with cheap practice drums. But on a real taiko, it is an exchange of energy; you give energy to the drum; the drum gives back energy... You give energy to a room full of people; they surround you with pure energy.

I am slowly learning to get blisters on my left hand. This means I am slowly learning to use it to do more than follow my right, as an independent entity. This is a great mental challenge.

I have learnt what kiai means. Shouting to gather energy seems pointless when you're not doing it. When you've been playing continuously for 20 minutes and you're exhausted and you feel yourself slowing down, shouting out releases energy and suddenly, the arms start moving again. And somebody hears you and answers, and you move together.

Taiko is becoming the reason why I stand tall and feel strong. If I can play the o-daiko, then there is nothing to fear in the world. I have never done anything that made me feel this confident. 

Not because I am a good taiko player, but because it makes me grow, and learn about myself and others, and share an unshielded part of myself. When you're playing taiko, you have to give it all. There is no other way.

Tuesday, January 18, 2011

A new technique

I have now learned a new knitting technique. Socks, toe up, two at a time on one long circular needle. It went like a charm and I love it! More to come! (Pictures too!)

Saturday, January 8, 2011

New books!

I haven't written much lately, for two reasons. One is, quite simply, the Holidays, with the cooking, shopping, tree-decorating, gift-wrapping and, let's not forget, being on vacation and doing nothing except eating, sleeping, watching TV and doing crossword puzzles.

The other reason is that two of the projects I'm working on are for people I'm afraid will get the bright idea of reading this blog. So, you'll have to wait until the projects are finished to see them!

But I'm here for a reason tonight: I wanted to talk about my new books!


Toe-Up 2-at-a-Time Socks
Publisher's site

First there's this one I've been wanting to grab for a long time. The main reason I want to learn this technique is that my mother gave me wool she bought in New Zealand. One ball is supposed to be enough for a pair of socks. I have small feet so I'm not afraid to run out; but wool this special, I want to use it all, I don't want any leftovers! With this technique I can knit from both ends of the ball and have virtually no leftover at the end!


The Ohio Knitting Mills Knitting Book
Here's the publisher's site.

I saw this one when it first came out and thought it was a very beautiful book. I had only seen it online though, I'd never leafed through it. Those are patterns I'd actually like to make!


Socks à la carte 2: Toes Up!
From what I can gather, this is the publisher's site.

I've been wanting to try different styles of heels for a while, and this seemed like a great reference for the most common types of toes and heels. It also shows several different types of toe-up cast-ons.


Creepy Cute Crochet
Publisher's site

Finally, I splurged and bought a sqweeeeee! book... you'll see... they're squeeeeee cute! And... this will force me to learn to read charts, which can't be a bad thing, right?


Lots of projects to come!

Good night everybody!