I cut the pannier skirt from an old sheet I bought at Village des Valeurs. I figured I'm probably going to wear it only a few times anyway so it doesn't need to be super tough.
Bonus: This part I was able to cut on the table instead of the floor.
Below you can see the boning channel guides for the pannier skirt. I used transfer paper and a tracing wheel. For those kinds of marks, there are not that many ways to get a great transfer.
And here it is with the channels sewn. I'll have pictures of it being worn when I put it on next Monday!
Next I made the bodice. Sorry I don't have any pictures of the construction. I used a very stiff and heavy fabric for the interlining, so I decided not to bone it. Maybe I should have, but I didn't want to add too much thickness to the seams. And it turned out that it was a good thing too, because I made the bodice slightly too small, so I had to ease out the side and center back seams. Now, I think it's a tiny bit too big, but that's much, much better than too small!
And then I made the overskirt. You can see the pleats on the side here. Towards the left there's supposed to be one last pleat, but I couldn't figure out how to gather it without the wrong side of the fabric showing. I ended up folding everything together, including the bottom of the previous folds, into the seam. That seems to work alright.
Here's the new corset! I had to rip out and recycle boning from the previous, much too small one, because there wouldn't have been enough time to order some new. This time I didn't shorten it at the waist or at the top, but I removed one full inch from the bottom. I think it could still have been shortened a little bit at the waist, but it still fits fine anyway. Much better than the previous one.
Turns out I actually made it slightly too big, so I had to take an extra seam at the center back to make it slightly smaller.
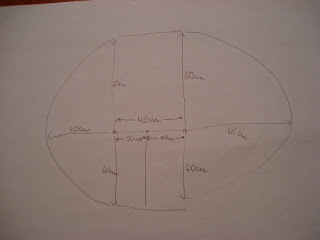
I even had time to make a cape! Below are pictures of the cape all marked and ready to be cut, and the pattern right below it. The trick when making a circle cape is to draw two half circles, taking your shoulder points as a reference. This way the length is just about even all around, instead of it being shorter at the sides and longer at the back and front.
Everything went so incredibly fast. I think I was expecting a lot of snags along the way so I planned for about twice the expected time to start with. When almost no snags happened, I was left with all this extra time! Which is good, because, by then, I had a cold, and I used the time to rest.
But I think the fact that it went so quickly is due to two main reasons: 1- I'm using Truly Victorian patterns, which are well made and true to advertised size. And 2- Since it's not the first time I use them, I know exactly where to fuse the sizes and shorten them so they fit right. I'm a small in the shoulders, and a medium for waist and hips, which means that I need to redraw the pattern pieces before I start. And I'm also short-bodied, which means I remove half an inch at the waist line and half an inch at the midpoint between bust and shoulders, which is a little trickier because it also involves lowering the armscye. But it works, every single time. That's only for the bodice though; for the skirts, I just do the medium size (and yes, they run extremely small, I wear sizes 0-2 in modern sizes in most stores - that is, those that make sizes small enough for me - so if the size medium fits me, imagine how small those patterns really are!).
So, things went well and fast. I bought some accessories, converted earrings to clips, dug out my old makeup and spent a lot of time on Rapunzel's Resource learning how to style long hair. I think it's all going to go together great and look fantastic :-)
And last but not least... I wanted to make a special giant tree for my big front window. I would have painted it with black paint on white fabric and lighted it from behind, but I ran out of time. It will be magnificent... next year :-)


No comments:
Post a Comment