Showing posts with label halloween. Show all posts

Tuesday, November 1, 2011

Halloween 2011, photos of the result!

So, after a good night of rest, I'm uploading what you've all been asking for: pictures of the finished dress!

Here's the corset and bustle. When I took the picture, I'd been wearing it (and sitting on it) all day and it had collapsed quite a bit. It was much poofier in the back when I left in the morning! I know you're going to ask the question: how to you sit in a regular chair with this thing? Well,  you just sit and it kind of collapses behind you, you don't even feel it! I'm sure not all Victorian bustles were this way, but the one made with Truly Victorian pattern is and it's such a blessing to be able to sit in a regular chair - after all I wore it to work...


Here's the inside of the bustle. The bones are held by ropes inside so you can adjust the poofiness of the skirt at will, and store it flat, two big advantages in the modern world. I also suspect that the fact I can sit in this thing so comfortably is also due to the inside strings allowing the bones to move independently.


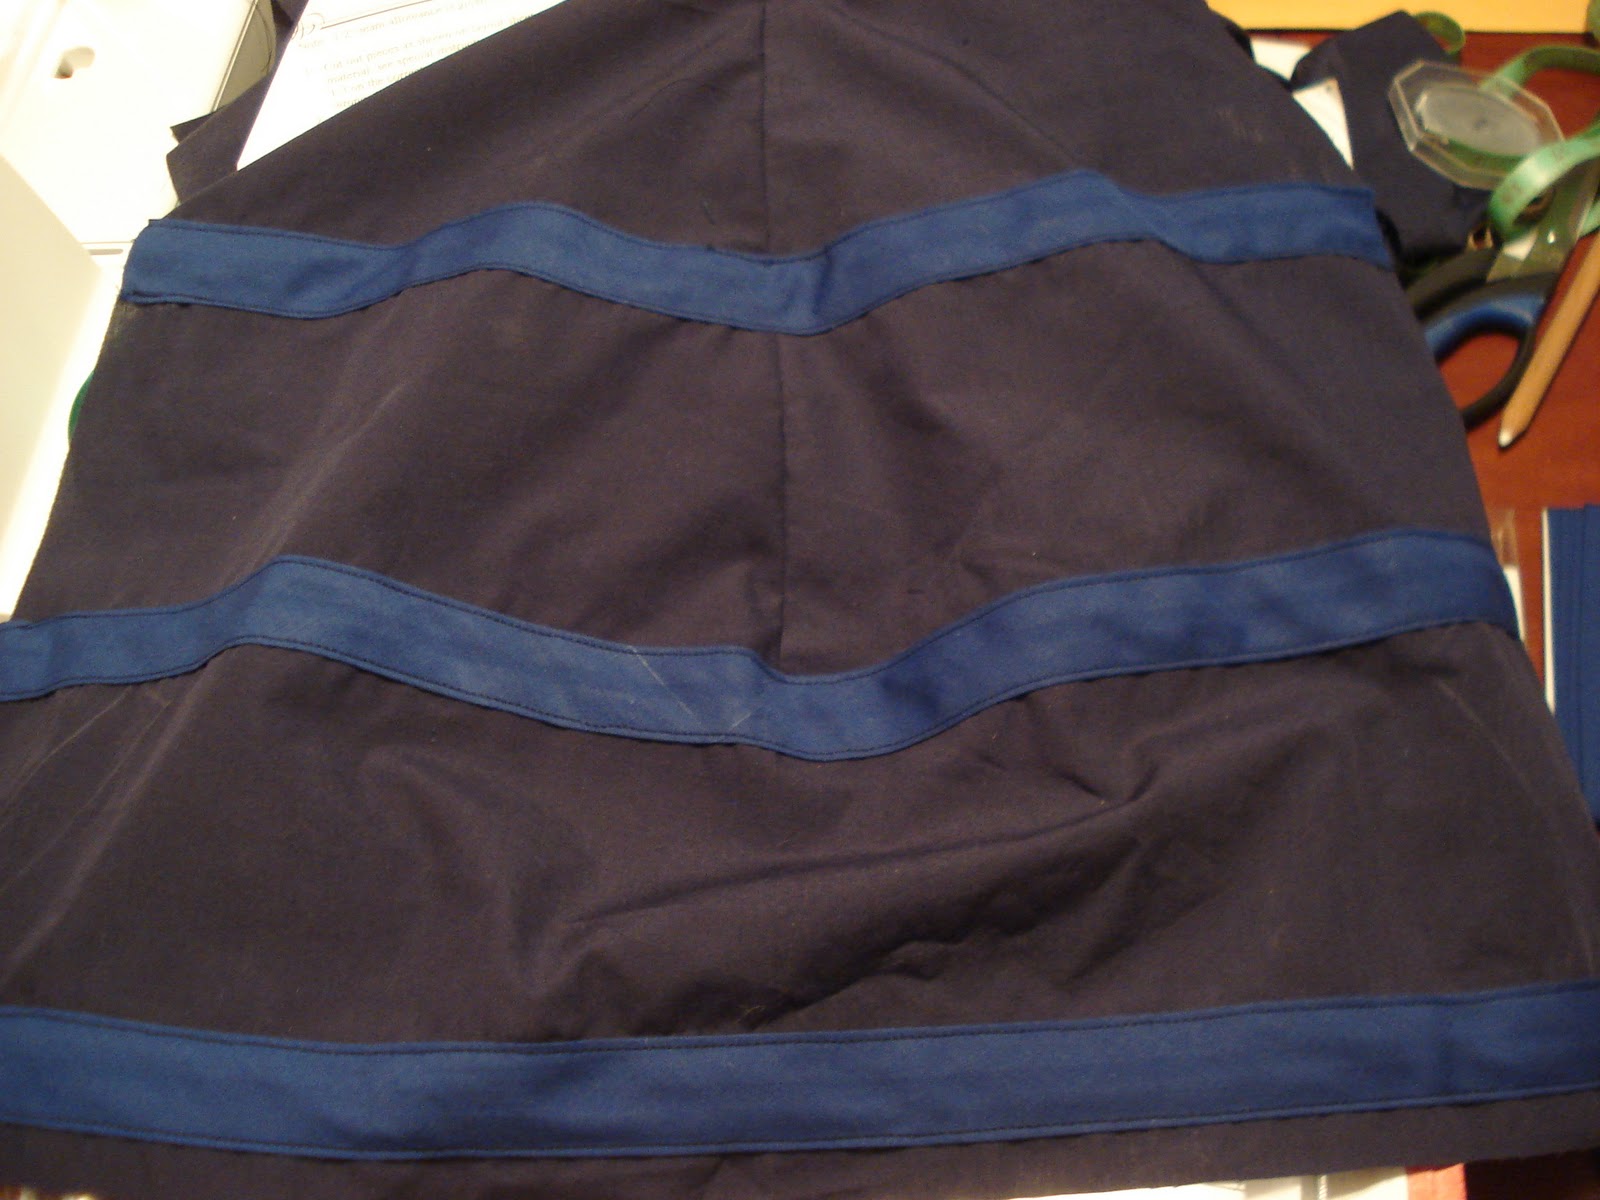
Next layer is the skirt. It's heavily pleated (and longer) in the back, which allowed me to hide my small mistakes (I placed the pattern the wrong way on the fabric and had to make a center seam in the back to fix it). My bustle collapsed slightly during the day so the skirt dragged on the ground in the back.


Next the overskirt goes on. There's not much to say about this layer. It looks much more complex than it actually is and it's easy enough to build.


And finally, the bodice. I think I actually made it a little too big, especially at the top, when I enlarged it (it was originally a little to small), so there wasn't enough tension on the hooks and they tended to pop off. But, as I said before, too big is infinitely better than too small. I put 25 pairs of hooks and eyes on the front of the bodice. This the only part I hated doing. I brought them to work so I could do 3 or 4 every lunch hour, because it's so long and boring to sew.


I styled my hair using tips from Rapunzel's Resource. This girl is amazing. I've had long hair my whole life and doing anything more than a ponytail seemed impossible, but she makes everything look so very simple! I still went for a simple bun instead of something more elaborate because I was really short on time in the morning.


I've had the necklace for a very long time. It's not the right style for the period, but I thought it looked really good with the dress. The bracelet, gloves and earrings I bought at Ardène, as I did the black flower in my hair. I had to fix the earrings to convert them to clips because my ears aren't pierced. The mask is a cheap cardboard mask I bought at Value Village (but they had almost the same ones at the dollar store this year).


I think it worked well. It's the first time total strangers (women, all of them) talk to me in the metro and near the office to tell me now nice they think my costume is. This one was particularly liked by little girls when I was opening the door to give candy (by then I'd removed my mask though, I was afraid it would get deformed by body heat - I'll need to line it with something better than cardboard if I want to wear it for a longer time).

And, finally, here's the decorations we managed to get together after I ran out of time for the giant tree. Sometimes it pays to have a lighting technician as a boyfriend :-)

So, we cut out a small tree out of cardboard (actually, Richard did). And he wants me to insist: doing it this way WAS HIS IDEA! :-)


I like taking pictures of him working :-)


Here's the setup (with an old, real, theater spotlight, and a small Ikea one; the big one being 10 times stronger than the other one, that's the one we put the pale purple colour on).


And here's what it looked like from outside. Not exactly what I was going for, but pretty nonetheless, I think :-)


Sunday, October 30, 2011

Halloween 2011

Here's the first part of the promised update about Halloween this year.

I cut the pannier skirt from an old sheet I bought at Village des Valeurs. I figured I'm probably going to wear it only a few times anyway so it doesn't need to be super tough.

Bonus: This part I was able to cut on the table instead of the floor.


Below you can see the boning channel guides for the pannier skirt. I used transfer paper and a tracing wheel. For those kinds of marks, there are not that many ways to get a great transfer.


And here it is with the channels sewn. I'll have pictures of it being worn when I put it on next Monday!


Next I made the bodice. Sorry I don't have any pictures of the construction. I used a very stiff and heavy fabric for the interlining, so I decided not to bone it. Maybe I should have, but I didn't want to add too much thickness to the seams. And it turned out that it was a good thing too, because I made the bodice slightly too small, so I had to ease out the side and center back seams. Now, I think it's a tiny bit too big, but that's much, much better than too small!


And then I made the overskirt. You can see the pleats on the side here. Towards the left there's supposed to be one last pleat, but I couldn't figure out how to gather it without the wrong side of the fabric showing. I ended up folding everything together, including the bottom of the previous folds, into the seam. That seems to work alright.


Next is the double box pleats at the back of the overskirt. Those were, surprisingly, super easy to make and turned out great. They'll be draped over the pannier right on my oversized behind. You'll see, this is going to be super elegant.


Here's the new corset! I had to rip out and recycle boning from the previous, much too small one, because there wouldn't have been enough time to order some new. This time I didn't shorten it at the waist or at the top, but I removed one full inch from the bottom. I think it could still have been shortened a little bit at the waist, but it still fits fine anyway. Much better than the previous one.

Turns out I actually made it slightly too big, so I had to take an extra seam at the center back to make it slightly smaller.


I don't have pictures of the skirt in progress, but it's the same fabric as the corset. I made it just before and it went so incredibly fast! Well, except that there wasn't supposed to be a seam at the center back... I just placed the piece the wrong way on my fabric. It'll be hidden in the pleating anyway so it doesn't matter, it was just a funny stupid mistake to make!

I even had time to make a cape! Below are pictures of the cape all marked and ready to be cut, and the pattern right below it. The trick when making a circle cape is to draw two half circles, taking your shoulder points as a reference. This way the length is just about even all around, instead of it being shorter at the sides and longer at the back and front.


Everything went so incredibly fast. I think I was expecting a lot of snags along the way so I planned for about twice the expected time to start with. When almost no snags happened, I was left with all this extra time! Which is good, because, by then, I had a cold, and I used the time to rest.

But I think the fact that it went so quickly is due to two main reasons: 1- I'm using Truly Victorian patterns, which are well made and true to advertised size. And 2- Since it's not the first time I use them, I know exactly where to fuse the sizes and shorten them so they fit right. I'm a small in the shoulders, and a medium for waist and hips, which means that I need to redraw the pattern pieces before I start. And I'm also short-bodied, which means I remove half an inch at the waist line and half an inch at the midpoint between bust and shoulders, which is a little trickier because it also involves lowering the armscye. But it works, every single time. That's only for the bodice though; for the skirts, I just do the medium size (and yes, they run extremely small, I wear sizes 0-2 in modern sizes in most stores - that is, those that make sizes small enough for me - so if the size medium fits me, imagine how small those patterns really are!).

So, things went well and fast. I bought some accessories, converted earrings to clips, dug out my old makeup and spent a lot of time on Rapunzel's Resource learning how to style long hair. I think it's all going to  go together great and look fantastic :-)

And last but not least... I wanted to make a special giant tree for my big front window. I would have painted it with black paint on white fabric and lighted it from behind, but I ran out of time. It will be magnificent... next year :-)


Saturday, October 15, 2011

New projects

Remember last year? I had all those projects...
http://audreybmorin.blogspot.com/2010/09/new-projects-halloween-soon.html

This year I'm using the beautiful fabric I bought last year. I'm taking pictures, I swear!

The bustle is done. The bodice is done (needs hooks and eyes). The skirt will go pretty fast.

Then I'll need to deal with my corset. Remember last year, it was rather small for me already? http://audreybmorin.blogspot.com/2010/10/corset-done-whats-next.html Well, I put on some weight; so now it's even smaller. I'm debating making a new one (reusing the boning would be a good investment) or making this one bigger by inserting panels in the center front, sides and back. Two weekends left before Halloween, will there be time to make a new one? I mean, it's not that long after all... but I don't want to come up short...

Friday, October 29, 2010

Done!

Pics! This is what I wore to the office today. Of course, it was originally meant as a Steampunk outfit... it turned into a riding outfit missing a hat ;-)... for now!


Wednesday, October 20, 2010

Fitting the bodice

If you've read my previous post, you'll know I was dealing with fitting issues and waiting for Richard to get home and pin the bodice on me.

What I found out: it was too long in front, but the back seemed to be the right length and the darts seemed to end in the right place. I guess it was just made for BIG boobs, and mine weren't sufficient to fit it ;-) Richard pinned along the shoulder seam evenly, a good 1/2 inch pinch, so I removed a full inch from the shoulder seam, but only at the front (and that was after removing an inch in overall length before I even got started!). Since this meant the front was now one inch higher, I had to redraw the neck opening (one inch lower). The front piece now being one inch shorter, I needed to also shorten the front lapel.

Alterations to the front and lapel pieces
We also pinched the side back seam slightly, since it was gapping at the back.

Side back seam, with extra removed
Fits much better now, doesn't it?


Sunday, October 17, 2010

More progress

I worked a lot on this project this week, and I was finally able to start sewing today! The skirt is done except for buttons and hem. No pics because, well, when it's not being worn, it looks rather like a big pile of fabric.

The day started with a big scare. As I was lining up the skirt pieces for flatlining, I had a sudden feeling that I had cut the thing on the wrong side. See, this skirt is meant to cover the legs of a side-saddle rider, so it's long on one side. Normally, you climb the horse from the left (the horse being on your right), so both your legs are on the left side of the horse; which means that the skirt is longer on the right side, so it covers both your legs gracefully as you're riding. But since it's asymmetric, it has to be cut all from the same side of the fabric so the longer part is on your right. For a moment there, I thought I'd cut my fabric on the wrong side! Phew, I'm glad it wasn't the case :-)

My big victory of the day: I fixed my sewing machine! A while ago, I must have screwed the small screw on crooked, because it seems I stripped it. It still worked for the regular foot, but my double-feed foot is thicker so it wouldn't hold that, and I really needed it for this project. I went to the repair store a couple of days ago but even with the machine model, they couldn't be sure which screw to give me, so they told me to come back with my screw. Well, the store is far and I needed it today, so I asked Richard if he thought I might find a similar screw in a hardware store. He answered maybe, but you'd have better luck in an electronics store. So... I dug out the bag of various screws I inherited when I was having problems with my motherboard; I found a screw that is identical in every way, except for the head. I thought it would be too big, but... look at that picture! It's just fine! (And much, much better quality than the original too!) (It's the big screw on the right, holding the white plastic part onto the vertical shaft.)


Let me introduce you to my double-feed foot.

So, I was able to do a decent amount of sewing without swearing too much ;-)

The bodice pieces were all cut and waiting for me. On top is my fashion fabric (wool); middle is the lining (cotton/poly percale); and bottom is flatlining (cotton denim) to give more body to the fashion fabric.


I assembled it and had the very good idea to check fit carefully before I was done. Even though I removed a standard (for me) one inch in length before I even started thinking about cutting my fabric, it's still a good 1/2 inch too big in the shoulders, and, as usual, the back of the armhole gaps. There's nothing wrong with the pattern; my body is simply made that way.

The waist fits really well :


The shoulders and armscye, in the back, need some adjustments. Thankfully, Richard is extremely good at pinning on a live body.


Tomorrow, well... I'll see how I feel after taiko... but I'll try to finish assembling the bodice! If I can finish my own costume before the weekend, maybe I'll have time to make something for Richard after all!

Tuesday, October 12, 2010

I hate cutting, I hate cutting, I hate cutting!

I know I said it before, but I hate cutting. Blergh!

For the record, I'm cutting the pieces for the riding skirt. But since the pieces are so wide, there's nowhere else to do it but on the floor in the middle of the living room, after having moved all the furniture to the side. And then I went and stepped into my pins container and sent it flying all over the floor because I was trying to watch the Steampunk Castle episode at the same time. (Thank God for magnets!)

Taken from the middle of the stairs; say hello to giant piece. This fabric is extra-wide, so it really doesn't look as impressive as it was in reality; in fact this pattern pieces is something like 54 inches wide!
Got three of the six annoyingly large pieces done; after that, I can move back to the dining room table.

But, even when I don't have to do it on my knees, I still hate cutting ;-)

Sunday, October 10, 2010

Corset done... what's next?

I seriously lost momentum. I was hoping to do Steampunk at Halloween but I got invited to... a Gothic banquet... So I'll dig out what I wore two years ago (pics here).

That leaves work. But it's not the same... Making a totally incredible costume to go to work where I'll be the only one dressed up anyway is... well... not like dressing up for a Halloween party!

In any case, I've kept pushing forward with the riding outfit. I don't know if it'll be finished in time, with only three weeks to go, but I'll try.

Here are the latest pics!

The corset, ready to cut:


The pieces, cut and the lining assembled to check the fit:


Then, the finished corset. Please note, it will be tied in the back, not around and to the front. This was just for trying it on without fiddling with the ties.


One thing I have discovered. I have absolutely no squish. They tell you that you should expect a 2-4 inch of squish. *I* squish about *one* inch. They tell you to keep a 2-inch gap in the back, but... well a 2-inch gap on a 25-inch waist looks really wide... So, the corset is a little too small, especially around the waist. The hips are just fine though, probably because the pattern isn't assuming any squish at all down there. Next one, I'll make a little bigger. And shorter too!

That being said, I still think it looks pretty nice :-)

Wednesday, September 1, 2010

New projects - Halloween soon!

This is a project I've had for a very long time. It's not meant to be historical, just to be great! I'm starting from Truly Victorian patterns. I'm going from this overskirt and bodice combination:

I've found some pretty cool fabric. I swore I wouldn't do red because it's been overdone already, but, you guessed it, the fabric I found is red. I've also found a nice patterned black.So, the question is, should I put the black over the red, or the red over the black? My thinking was this: If I do black over red, then I can wear the red underskirt alone, and maybe I have enough red fabric left to make a second, lower bodice (think ball gown), and maybe I've got enough black left to cheat and borrow the vest basque from the early bustle period.

If I do black under, then... well I guess it ends up being pretty much the same. I can wear the black gown alone with a lower bodice, and maybe I've got enough red to make... well... I can't see myself making a vest basque from the red fabric.

So I guess it comes to this: I think the red would make an absolutely fantastic waterfall overskirt; and I think the black would make a couple of nice bodices.

How weird would it be to have a bodice matching the skirt instead of the overskirt?


Verdict is this: I need to change my bodice choice.

So, in red, I can make this: 


And, in black, I can make one of these two:


I really think I need to do the first bodice I wanted to do all in black lace to get the effect I want; that and a layered under skirt with no flouncy overlay. Maybe like this.


Or simply like the one on this page:  http://www.reconstructinghistory.com/tv208-1870-trained-skirt-ensemble-pattern.php?s=&c=22&d=186&q=2&p=684&w=21

No colour or fluff. That'll be for another time!


I said I was going to talk about Halloween, didn't I? Well, the project above, or rather, the original project, the one I just said I will have to do all in black, was supposed to be my Halloween costume this year. I had it all figured out, including a supplier for the contact lenses I was to wear. But... Richard has said the magic word Steampunk, so I can't let it pass.

Tomorrow, I will be ordering the riding habit skirt and bodice...see, I already have the fabric for it, and it just happens to be tan...